Getting your domain name is the first step to creating an online identity. Selecting the best domain registrar might be difficult because there are so many to choose from. Namecheap is a well-liked option for both novice and seasoned website proprietors.
The well-known domain registrar Namecheap provides an easy-to-use procedure for buying domains.
We'll take you step-by-step through the Namecheap domain purchase process in this extensive guide, so you can start your online journey with ease.
Table Content
1. What is Namecheap?
2. Creating an Account on Namecheap
3. Searching for the Perfect Domain
4. Domain Availability and Pricing
5. Adding the Domain to Your Cart
6. Reviewing Your Cart
7. Account Information
8. Whois Contact Information
9. Making the Payment
10. Order Review
11. Order Success
12. Email Verification
13. FAQs
What is Namecheap?
Namecheap is a web hosting and domain name registrar with headquarters in Phoenix, Arizona, and is recognized by ICANN. With more than 10 million clients and more than 17 million domains under administration, it is among the biggest independent domain registrars in the world.
Among the many services that Namecheap provides are:
Domain name registration, transfer, and renewal
Domain privacy protection
Web hosting (shared, VPS, dedicated)
Email Hosting
WordPress hosting
SSL certificates
Website Builder
VPN
DNS management
Domain marketplace
Step 1: Creating an Account on Namecheap
You must first register for an account with Namecheap to begin. We'll walk you through the process of creating an account in this part so you can use Namecheap's services.
Proceed to Step 2 if you already have a Namecheap account, omitting this step.
Launch the web browser of your choice and go to the Namecheap website.
Select the Signup link located in the upper left bar.
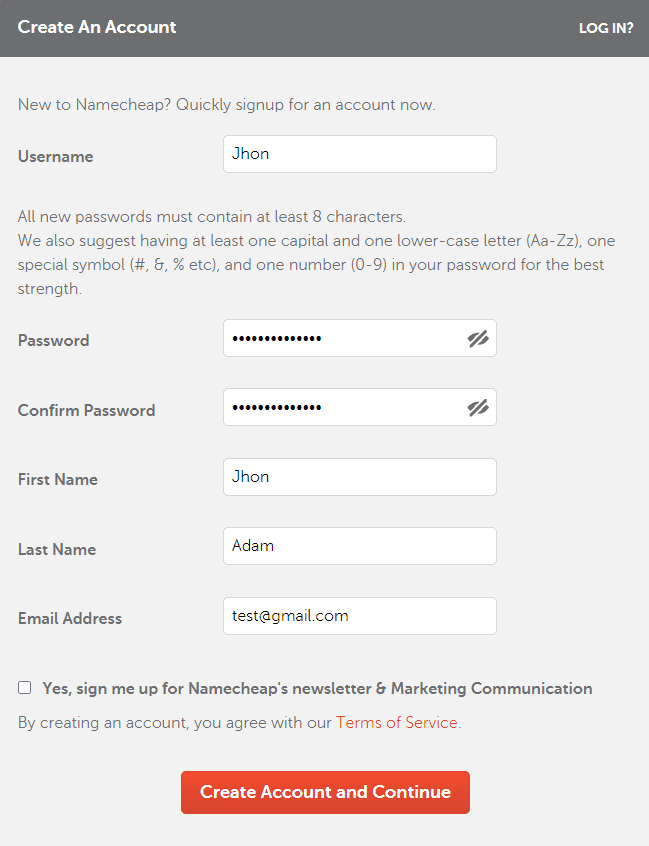
Take a look at the Namecheap Signup form, which asks for your email address, first and last names, username, password, and other essential information.
After completing every field, press the "Create Account and Continue" button.
Step 2: Searching for the Perfect Domain
Selecting the ideal domain name is essential to the success of your website. Here, we'll walk you through utilizing Namecheap's easy-to-use search tool to look for domain names that are now available.
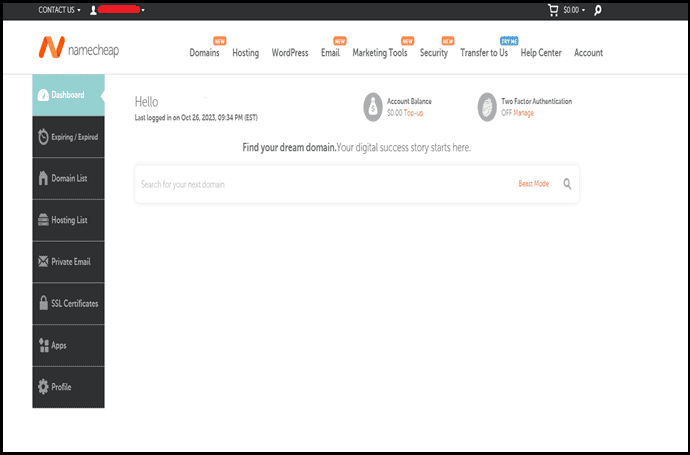
Have a look below This kind of dashboard will appear on Namecheap if you have successfully registered or logged into your account.
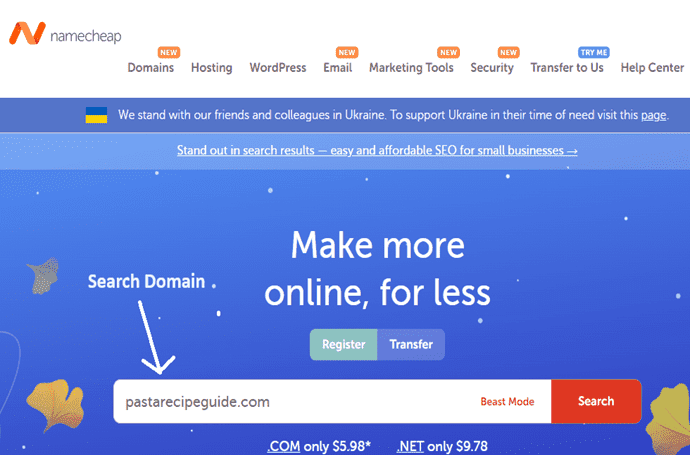
Go to the top move your mouse pointer to the "Domain" option and click on the "Domain Name Search" option.
Search for a domain name in the search bar.
Research my case. I looked for the ".com"-extended domain pastarecipeguide.com.
Step 3: Domain Availability and Pricing
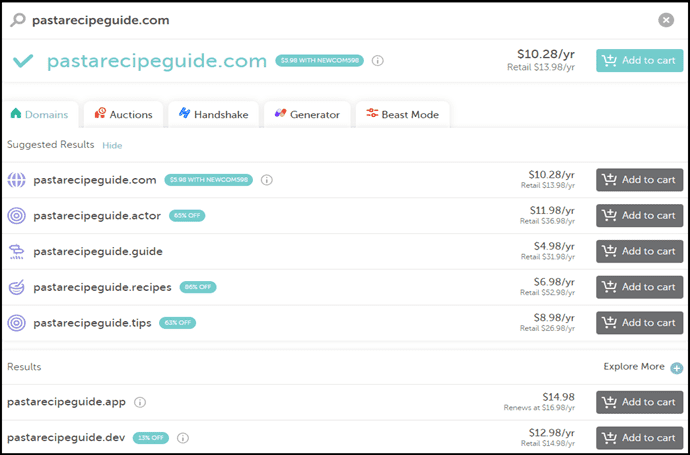
Namecheap displays the domain name along with an extension and price if the domain name you looked for is available.
Namecheap also provides a promo code for a discount in this section, specifically for first-time customers.
Have a look below Additionally, Namecheap displays domain names based on searches with various extension kinds.
Step 4: Adding the Domain to Your Cart
After verifying the domain you've chosen and the price, click "Add to Cart".
After the Add to Cart button clicks, Namecheap displays other services including Web Hosting, WordPress Hosting, VPN, SSL, and so on.
Step 5: Reviewing Your Cart
Reviewing your order is essential before completing the final purchase.
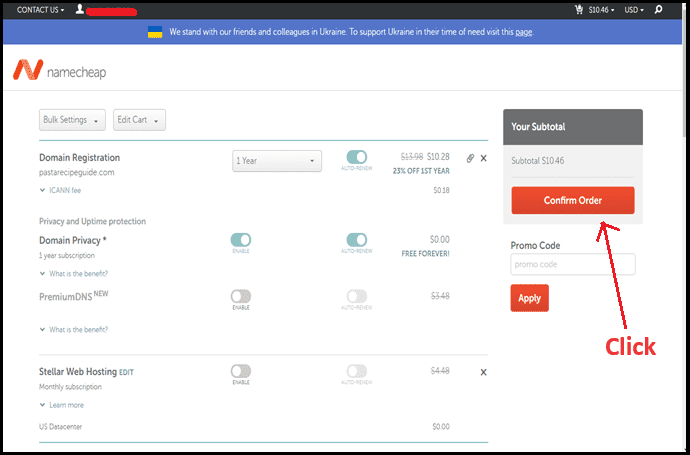
Select the "View Cart" button located in the upper right sidebar.
Here, Namecheap displays the subtotal cost of a domain once you click the "View Cart" button.
A select option with a domain registration year plan—such as one year to 10 years.—is provided in this area.
You can modify the domain registration plan to suit your needs by using the choose option. If you choose a two- or three-year plan, the subtotal price will automatically increase.
If you have a discount code, you can input it here to reduce the price. This area has the Promo Code option.
If you decide not to purchase a certain domain, you may also use the remove option.
Click the "Confirm Order" button after checking your order and subtotal.
Step 6: Account Information
Namecheap requests your account contact details after you click the Confirm Order button.
You must fill out this form with the necessary details, including your address, phone number, city, state, and last name.
Click the "Continue" button once the form has been filled out.
Step 7: Whois Contact Information
By default, the Whois Contact Information is shown in this section. After reading it, press the "Continue" button.
Step 8: Making the Payment
You have to complete the payment at this stage. Choose your preferred payment option at this point.
You have the option to use PayPal, Account Funds, or Secure Card Payment during the billing step.
Click "Continue" once the payment type has been chosen.
Step 9: Order Review
After reading the subtotal, click the "Pay Now" button. This step displays the amount you will be paying.
The domain registration process may take a few minutes after you hit the "Pay Now" button.
Step 10: Order Success
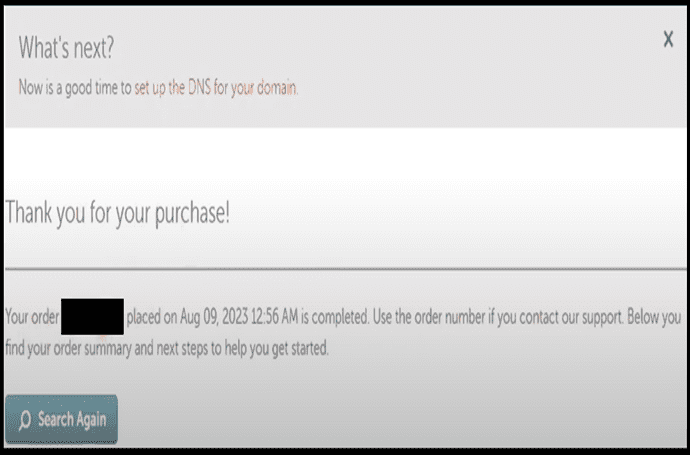
Your domain's subtotal will be successfully paid if your payment method is successful, and an order number and thank-you message will appear.
For an accurate view of your domain's addition, click the Dashboard.
Step 11: Email Verification
Verifying the address on your email is the last step. Namecheap sends you a verification email to confirm the email address you submitted.
Go to the email box that you entered in Namecheap click on the verification link and verify your email address.
After your email is verified a box appears with the verification success message.
Frequently Asked Questions
Q: What is a domain registrar, and why do I need one?
An organization that enables you to register and administer domain names for your website is known as a domain registrar. To have a distinctive web address for your website, you must have one.
Q: Can I transfer my domain from another registrar to Namecheap?
Yes, Namecheap offers a domain transfer service that enables you to transfer your current domain to their platform from another registrar.
Q: Are there any additional services offered by Namecheap along with domain registration?
Yes, Namecheap provides extra services like email hosting, web hosting, and SSL certificates that let you improve the security and value of your website.
Q: What should I do if the domain name I want is already taken?
If the domain name you want is already taken, Namecheap might recommend different domain extensions or variants.








No comments:
Post a Comment